Installing a new battery into a 2nd generation iPod
Friday, April 2, 2004So, I did it! As I already said I have a new battery providing power for my G2 (that’s second generation) iPod. And this one is not dying on me daily because it’s brand new! Seeing some topics over at the forums of ipodlounge.com I realized that some people out there are scared to do the replacement themselves. That’s why I decided to post this and provide the “experience” I accumulated by replacing the battery myself. It’s not hard but if you read this mini guide please read it fully before starting and also check out the pictures at the bottom.
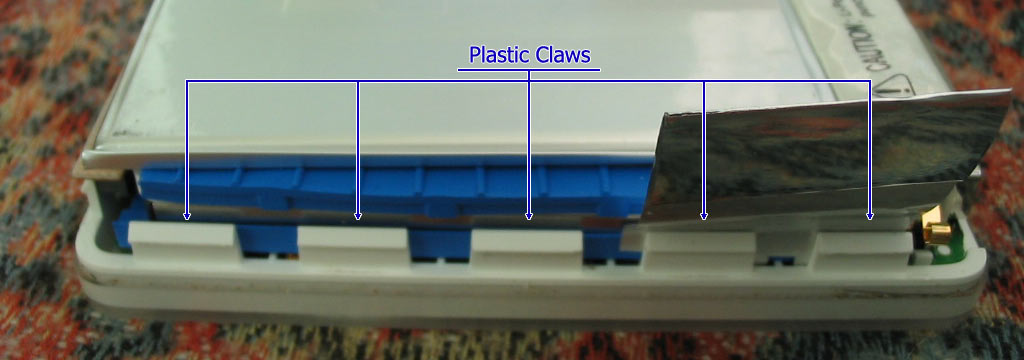
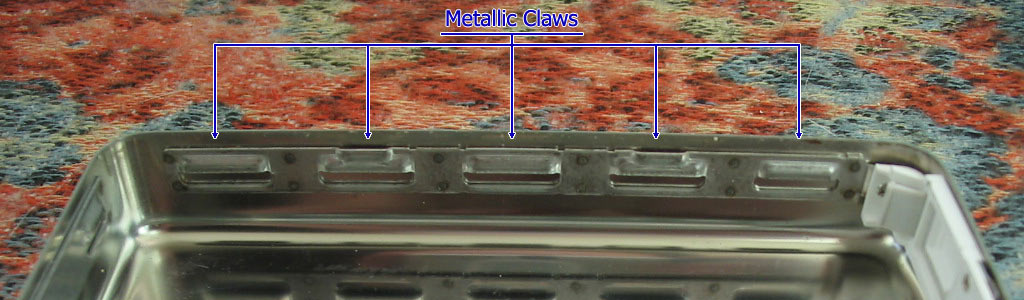
I think the hardest part is obviously the opening part. And this is because the iPod is not fastened together by screws but the shiny back of the device kind of snaps on and is held on by some plastic and metallic claws combination. I used a simple screwdriver to open it and the rule when using a screwdriver is the wider and thinner the head is, the better! There’s also a plastic tool available at various shops around the net and if you’re really concerned about scratching the back of your beloved player you should get one of those. As I got it second (or third, or fourth) hand the back of my iPod was pretty scratched by default so I wasn’t worried by the scratches, however I managed to do everything without adding a scratch.
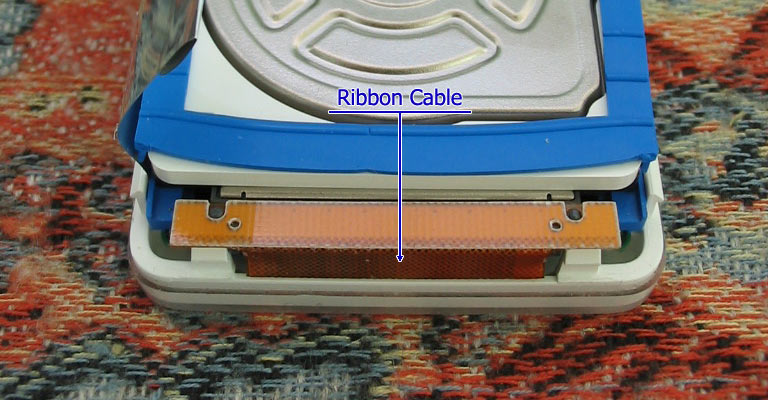
I begined opening it starting from the top, around the headphone jack. The top does not open from the start so I worked my way down one side and then bottom. A word of advice: be very careful how deep you insert the screwdriver when doing the bottom because the ribbon cable that connects the hard drive to the mainboard is right under the case and if you damage that, you can wave your iPod farewell. Once one side and the bottom is opened you can easily open the other side and then the top at the end. And voila: the back is off! The battery replacement is trivial as you have to unplug the battery cable from the socket and then insert the new one.
Be amazed of the size of the hard drive as long as you want but then it’s time to put it all together. First I would recommend to plug in the Firewire cable and see if it works. Actually I fully charged my iPod in the opened state to see if it works and only after I was convinced that yes it’s charged and it works as it did before opening it I put it all back together.
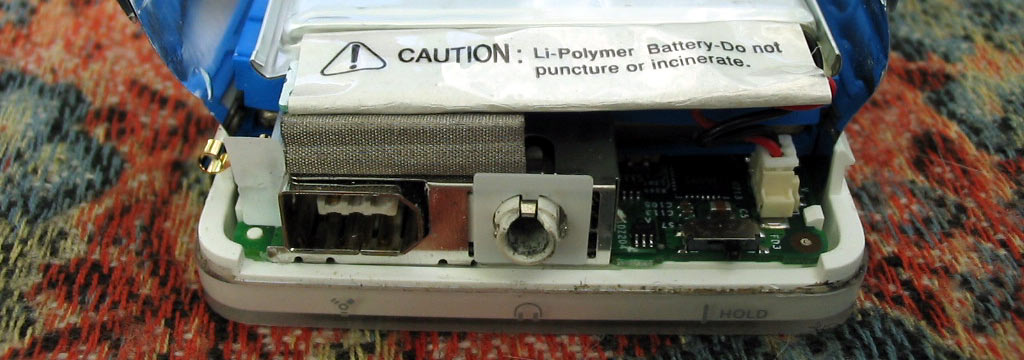
You do this by checking first if the battery cable is tucked safely between the battery and the mainboard. Align the top of the battery with the top of the mainboard and ply the shiny bands over it. Then put the jack and the Firewire port into their respective openings on the top of the back cover and get assured that the hold button fits where it should in the slider. Then push it all down starting from the top and finishing with the bottom. It should snap together as a charm.
And it’s done!
Here are some photos of the innards:
- The plastic claws and the metallic claws on the sides that hold the iPod together.
- The ribbon cable that connects the hard drive to the mainboard at the bottom.
- The battery is properly aligned and it’s cable is safely tucked.
I hope this will help at least someone out there. If you read it and find it helpful please don’t forget to leave a comment as that’s the only way I know I haven’t wasted my time writing this. Thanks.